KC is sponsored by

The Shoe Shed - Climbing shoe resoles in the Holme Valley - Increase the life of your best loved climbing shoes

Click here


Competition

The £70 of Crag Station vouchers were won by Damian & Katharine

Comp is closed


Local Notice Board

Announcements, crag clean ups, meets, partners wall nights, etc

Click here

Standedge

Javascript is required to view this map.

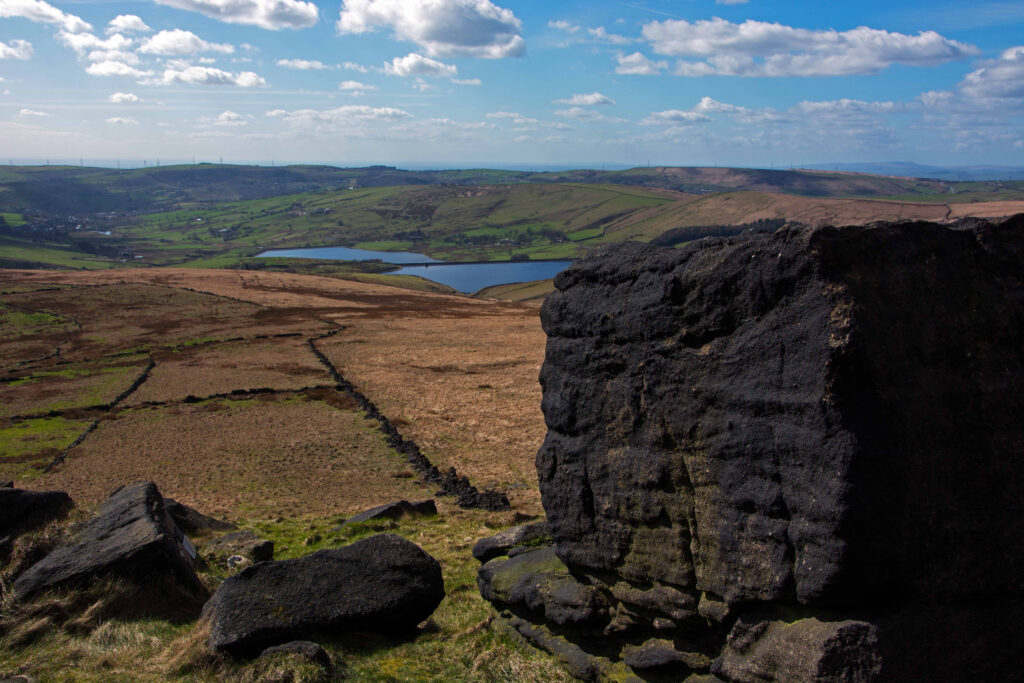
Standedge is technically in Lancashire and not Kirklees however, due to its quality bouldering and proximity to Kirklees it is included in our guides. The old quarry has a few routes but it is the edge itself that has a range of quality bouldering on nice rock.

Names of the problems are as per the 2002 Huddersfield Area Bouldering Guide and the new Over the Moors BMC guide, where the names do not match the Huddersfield name is used first and the BMC name is in brackets to aid with problem identification and logging.

ACCESS

Park up in the layby on the A62 where it is crossed by the Pennine Way. Cross the road and head north on the Pennine Way through some fields and up onto the moors. The majority of the problems lie below the path on the left. They are quite spaced out and as such it might be a good idea to familiarise yourself with the layout from our website before venturing out.

An easy to print PDF TOPO guide to all the problems can be downloaded from here

BETA ALERT!

Click on the camera icon to view images of the problems being climbed or click on the video icon to view videos of the problems being climbed.


The Problems

Hovering your mouse over, or clicking on, the name/grade of the problem will show the problem highlighted on the topo photograph below.

The Problems are described from South to North along the edge as you reach them walking from the A62 along the Pennine Way.
They are split into 10 sectors as shown by the markers on the above map.


Sector A - Small Quarry
1) The easy arete on the right of the quarry
2) Font 3 Up the middle of the slabby wall using the rounded hole
3) Font 3 The left edge of the wall
4) SHORT LINE - Font 5 The dirty crack


Sector B - Quarry Boulders

5) Font 5 Climb the middle of the wall from the small cave
6) Font 3 The short arete


7) SPACE TRIP (HIGH TRAVERSE) - Font 5 From the top of the gully traverse the the high break leftwards to the highest point
8) SLAB VIA SMALL POCKET - Font 3 Climb the wall from the low hole
9) DIRECT PAST DISHED POCKET - Font 6a Pull up the wall on crimps and pebbles
10) SLIGHT RIB - Font 6a+ Climb the slight rib from the right side of the overhang
11) LITTLE RED CORSA - Font 6b Just to the right of the slab tackle the overhang to the ledge and up the wall
12) JAMES'S COCONUT BONG DIRECT - Font 5+ Direct Finish to next problem
13) JAMES'S COCONUT BONG - Font 5 Go up the slab then traverse left on jugs to the widest point then finish directly up


14) Font 4 To the left of the overhang there is a ledge, climb the wall above this to the right finishing on the prow
15) Font 3 The short tower from the ledge
16) Font 4 Climb the small nose


17) Font 3 Climb the faint arete
18) Font 4 The scoop direct, often green


19) Font 4 The middle of the rippled wall
20) Font 3 The slabby wall to the slabby top out
21) Font 5 The left of the arete
22) Font 6a From the grassy ledge use the pocket to reach the break and then the top


Sector C - Problem 23
23) Font 3 The small gently leaning wall, so green it is rumoured to glow in the dark!


Sector D - Where Sheep go to Die
24) RIGHT WALL - Font 3 The cracked wall starting from the rounded hole
25) BLIND CRACK - Font 5 Sit start the blind crack
26) Font 3 The nose before the start of the overhang
27) POGO (RIGHT BULGE) - Font 5 Starting in the corner of the overhand head for the flake then the top
28) PINCH AND LEAN BACK (LEFT BULGE) - Font 6a Starting from the middle of the overhang head out and then up
29) BULGE 'N CRACK - Font 6b The hairline crack
30) THIN CRACK - Font 3 Jam your way up the crack
31) Font 6a The middle of the face on crimps and slopers
32) OVERHANGING ARETE - Font 5 Climb the overhanging arete
33) Font 3 The easy slabby wall
34) SHEEP SKELETON (DEAD SHEEP) TRAVERSE - Font 5 Traverse the wall from left to right, rumoured to stay dry in winter!
35) Font 3 The small nose 10m left of the previous problems


Sector E - Small Slab Area
36) Font 3 The rippled wall, easy climbing, bad landing
37) Font 4 Sit start in the cave, undercut the crack and then jam up the thin crack to the top
38) Font 5 Start on the small slab and reach the top via slopers


Sector F - Sitting Starts Area
39) Font 5 Sit start the flakes low on the corner of the block, move left to the knob and then over the rounded top
40) Font 5 Sit start the lowest flakes again then go right to a hard rockover to the middle of the small face
41) PUMICE STONE - Font 6a Sit start the lowest flakes again but head direct up the nose
42) Font 6a Sit start the lowest flakes in the cave, move left and up the slab
43) BRUTUS - Font 6a Sit start the flakes low on the corner of the block again and traverse the low breaks to the left then up on the slab
44) SHREDDER - Font 6a Sit start the flakes low on the corner of the block, move left to the knob then traverse left on sharp holds to finish on the slab, aptly named


Sector G - Trig Point Boulders

45) THE WAN KING WOMAN - Font 3 Traverse the big break from left to right
46) Font 4 Climb the middle of the wall
47) Font 4 Use flakes to make the break and continue upwards


48) FIVE KNUCKLE SHUFFLE - Font 4 Mantle the top of the lowest point of the sloping boulder
49) Font 3 Another mantle
50) Font 3 Climb the scoop
51) Font 3 Use the flakes and work up to the mantle
52) BONE ALONE - Font 5 Up the sidewall on rounded holds


53) Font 3 The leaning arete taken on the left
54) Font 3 The middle of the overhang on jugs
55) Font 3 Up the overhanging face
56) Font 3 A right to left traverse of the overhanging face from the sidewall


57) Font 3 The short side wall
58) PLAYING THE BANJO (THE ARETE) - Font 4 Directly up the rippled arete
59) NAKED SUNBATHING (THE WALL)- Font 3 Climb the centre of the wall using pockets and crimps
60) SEX TOY (JAMMING CRACK)- Font 3 Jam your way up the crack
61) Font 3 The short wall
62) BLIND FLAKE - Font 3 Climb the crack
63) Font 3 The middle of the small wall


Sector H - Hidden Wall
64) TESTING TOP - Font 3 Climb the crack
65) ELIMINATE THE WALL - Font 3 The middle of the wall
66) FLAKE CRACK - Font 4 The flakey crack
67) THIN CRACK - Font 4 Another flakey crack
68) FINGER JAM CORNER - Font 4 Slightly highball crack
69) HAND CRACK - Font 3 Another slightly high crack
70) RIGODUNUM - Font 4 The arete direct from a sitting start


71) THERE AND BACK - Font 4 Traverse the wall going left to right along the lower break then back along the top break
72) LEFT WALL - Font 4 The broken wall in the alcove
73) Font 3 Sit start the flakes under the overhang, moving left then up the broken wall
74) TERRORDAKTIL - Font 5 The three overhangs taken direct, high!
75) GREEN GASPER - Font 3 The left side of the overhang heading rightwards at the top
76) Font 3 100m North of these last problems past a stream is a small wall, climb the flake near the right arete
77) Font 3 The centre of this wall


Sector I - Triangular (Square and Cheese) Block Area
78) Font 3 The easy face climbing through LEE H


79) Font 5 Climb the wall eliminating the right edge
80) RIGHT LINE - Font 4 The right line
81) CENTRAL LINE - Font 3 The middle line via the break
82) ELIMINATE WALL - Font 3 The middle of the wall
83) Font 3 Up the scoop then up the wall above
84) Font 3 The sidewall above the bad landing
85) WALL - Font 5The small wall
86) THIN WALL - Font 5 The wall above the edge of the block
87) SHORT ARETE - Font 4 Layback the arete


88) Font 3 Climb the rippled wall
89) Font 3 The right edge of the wall via a flake


90) Font 3 The middle of the wall
91) Font 3 The wall with the 2 horizontal breaks


92) Font 3 The wrinked wall
93) Font 4 Mantle the top using the flakes and lip of the block, the left arete is in
94) Font 4 Step off the block and into the scoop of the upper block


95) TRAVERSE - Font 6a+ From a sitting start traverse the chest high break around 2 sides of the block in either direction
96) Font 5 The right face
97) BULGE - Font 4 Sit start the crack
98) Font 4 Sit start from the low flakes onto the rounded flake and then mantle
99) OVERHANG - Font 6a Climb the overhang from a sit start
100) Font 6a+ Sit start from the low flakes again but head left and then up the arete


95) Font 6a+ From a sitting start traverse the chest high break around 2 sides of the block in either direction
101) ARETE - Font 5 The left side of the arete
102) CRINKLY WALL - Font 4 Climb the wall via the blind flake
103) Font 4 The middle of this bit of the wall
104) Font 4 The left side of the wall


Sector J – Low Roof Block Problems
105) Font 5 Sit start the good holds at the back of the overhang to the break on the right then up on slopers
106) Font 6a Sit start from the same holds but go left to slopers then up
107) Font 6b Sit start from the same holds and up to the slopers again this time go left along the lip and up the nose
108) Font 6a+ Sit start the left of the roof to the hold at the bottom of the nose and head up to the jug
109) Font 5 Sit start just left of the roof, move out right to the nose and up to the jug
110) Font 6a Sit start just left of the roof to the 'ear' and up

Location

53° 35' 29.6232" N, 1° 58' 57.6804" W
 

facebook

Follow us on Facebook so we can notify you via your wall of any site related news and competitions


Vimeo

Check out our bouldering videos on Vimeo


YouTube

Check out our bouldering videos on YouTube